Labels
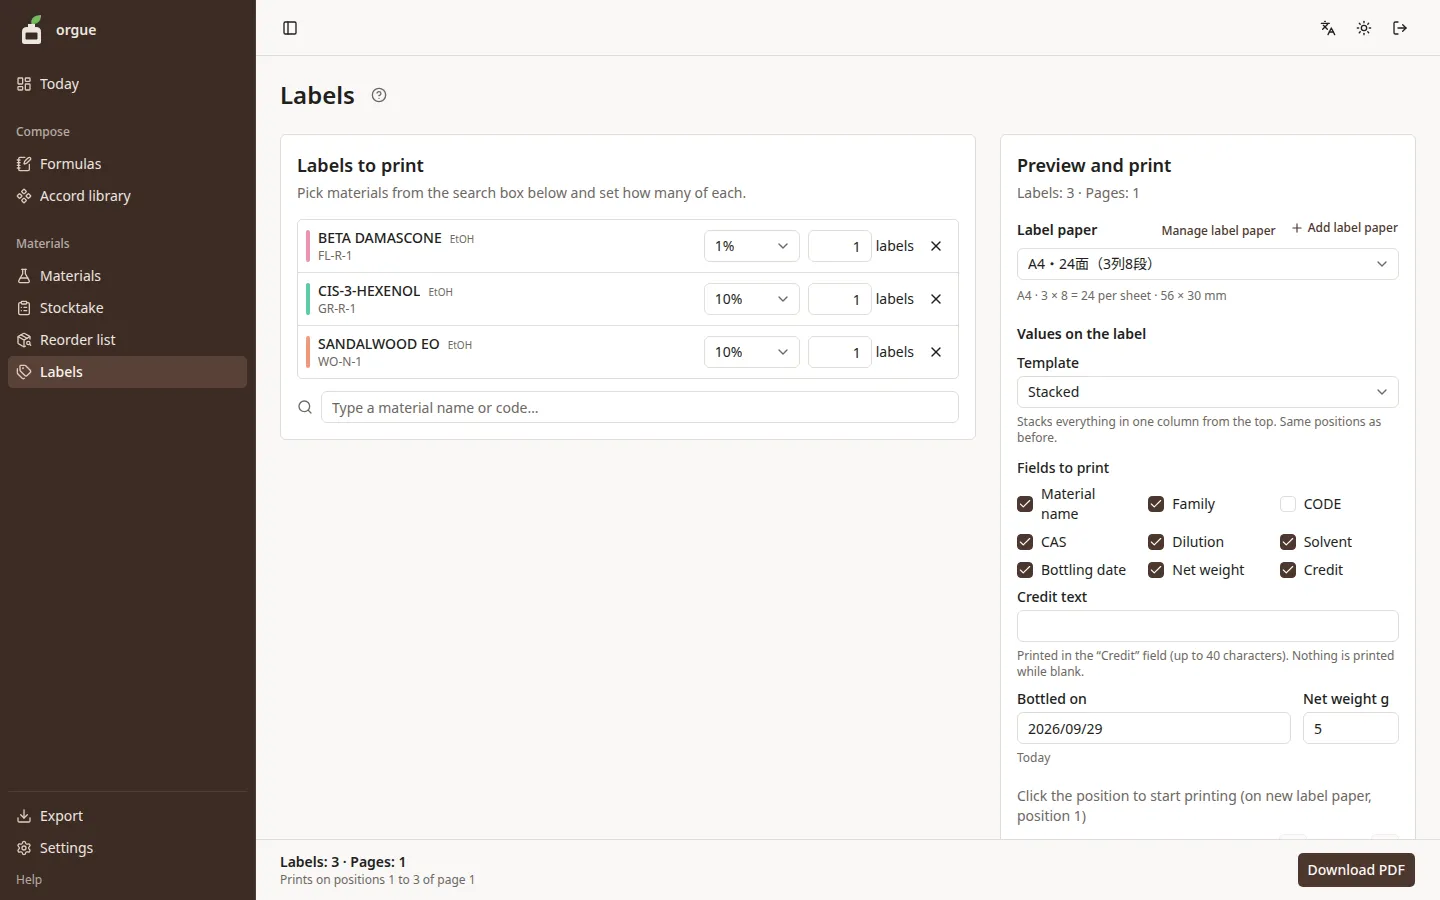
The screen for laying out bottle labels on A4 label paper and printing them as a PDF. Choose a label paper and make labels with the material name, CAS, dilution, solvent, bottling date, and net weight.
What you can do#
You make labels for the bottles you decant into. Line up the labels to print, choose a label paper and where to start printing, and download a PDF. Open it from “Labels” in the “Materials” group of the sidebar.
One label holds the family, material name, CAS, “10% in EtOH” (dilution and solvent), bottling date, net weight, and the credit.
Steps#
- In the search box under “Labels to print”, enter a material name or CODE and select a result to add a row
- For each row, choose the dilution (10% / 1% / Neat / Other) and the number of labels
- Under “Label paper” on the right, choose the label paper you use (the default is A4 · 24 labels (3 × 8)). The paper you choose is used the next time you open the screen too
- Under “Values on the label”, check the bottling date (“Bottled on”, default today) and the net weight in g
- Select a position on the preview to choose where printing starts. The positions before it turn gray (already used)
- Select “Download PDF” in the print bar at the bottom
- Print the PDF on label paper at “Actual size” (no scaling)
Label paper#
If your label paper isn't in the list, add it with “Add label paper” under “Label paper”. Enter the name, page width and height, label width and height, columns and rows, left and top margins, and horizontal and vertical gaps (all in mm). When you save, it's added to the list and selected. If the dimensions make the labels run past the page, a note appears under the fields.
Solvent#
The solvent in “10% in EtOH” is set for each material (EtOH / DPG / EtOH & DPG). Select the small text next to the material name in a row (“EtOH”) to choose from the three. Your choice is saved to that material and applies to every row of the same material. You can also change it when editing the material.
If the print is misaligned#
Open “If the print is misaligned” below the preview to adjust the print offset for that label paper (horizontal and vertical in mm; right and down are positive, ±10).
- Print “Test print PDF (current values)” on plain paper at “Actual size” (it prints one sample page and the label frames, using the offset before saving)
- Lay the printout over the label paper. If the frames are off to the right, make the horizontal offset negative. If they are off downward, make the vertical offset negative. Then test print again
- When it lines up, select “Save offset”. The offset is kept for each label paper
Good to know#
- When you open the screen, the position after your last PDF is selected. If you switch to new label paper, select position 1
- Labels beyond the number on one sheet continue on the next page. The print bar shows text such as “Prints on positions 16 to 21 of page 1”
- When you switch label paper, the start position goes back to position 1
- You can save a finished PDF again with “Save again” in the print bar